Первобытные технологии и другие «хвосты». Первобытные технологии
Первобытные технологии и другие «хвосты»: fritzmorgen
1. Кто бы мог подумать, что простой майнкрафтер из Австралии станет популярным ютубером, просто выкладывая видео с молчаливым процессом первобытного хэндмейда? Однако же вот, пожалуйста: у него уже почти полтора миллиона подписчиков (при 15 выложенных видео), и зрители ожидают новых его работ с огромным интересом.
На прикреплённом к статье ролике вы можете наблюдать процесс изготовления примитивного ткацкого станка для плетения циновок из коры молодых деревьев. Я не очень понимаю, зачем она нужна в первобытном народном хозяйстве, но, уверен, древние люди находили циновкам какое-то применение.
(Для древолюбов. Из описания видео ясно, что ни одно дерево не пострадало, австралиец освежевал труп растения).
2. Мой прогноз оказался верным — движение в сторону ПОПС заставляет страны Запада уже сейчас осложнять деньги тем, кто хотел бы хранить деньги в сейфах в виде наличных.
Стало известно, что Европейский центробанк тихой сапой убирает из оборота (и уничтожает) купюры в 500 евро. Общая сумма изъятых только за последние месяцы банкнот составляет 10 млрд евро:
http://expert.ru/2016/05/1/etsb/
Предполагается, что уже в мае о начале борьбы с крупными купюрами будет объявлено официально: тогда у населения отберут все оставшиеся пятисотевровые банкноты.
3. Список вузов, которые смогут самостоятельно выдавать степени кандидата и доктора наук, будет серьёзно расширен:
http://pavel-shipilin.livejournal.com/563895.html
Это грустно. И так-то сейчас носители учёной степени зачастую получают её не вполне прямым путём. Если же степени будет присваивать по своему усмотрению любой провинциальный вуз…
4. А вы обратили вчера внимание, что новости о переводе торговли нефтью на рубли пришли из «Блумберга», а не из какого-нибудь РБК? Руслан Осташко полагает, что всё дело в деградации наших журналистов:
http://ruslanostashko.livejournal.com/36098.html
Я согласен с ним полностью. Наши «деловые» журналисты уже опустились до уровня копипастеров — и даже о происходящем в России они узнают зачастую исключительно из статей в англоязычных СМИ.
Отмечу особо, что начало торговли нефтью за рубли — важнейшее событие для нашей страны, и что шли мы к этому очень долго, преодолевая по дороге весьма серьёзные препятствия. Тот факт, что наша «деловая» пресса узнаёт об этом из статей в «Блумберге» — это приговор.
5. По следам наших публикаций. ФАС оштрафовала «Росгосстрах» за навязывание автолюбителям «допов» к ОСАГО:
https://aftershock.news/?q=node/393246
Напомню, я писал об этой проблеме несколько дней назад:
http://fritzmorgen.livejournal.com/880260.html
Во многих городах России купить полис ОСАГО можно только за слегка замаскированную под дополнительные услуги взятку — и эту проблему пора уже оперативно решать.
6. Российская фармотрасль полна амбициозных надежд. Цитирую одного из наших фарммагнатов:
Мы каждый год наращиваем мощности вдвое; постоянно идет монтаж новых линий. Я вижу, что и коллеги тоже растут.
Мы начинали с простых препаратов для госпитальной медицины; она обеспечила нам большой объем, необходимый на старте. Сейчас мы сохраняем присутствие в этом сегменте, но также погружаемся в производство более сложных продуктов для розничного потребителя — например, будем делать все 27 существующих препаратов в офтальмологии, включая лекарства против глаукомы. Также будем выпускать эноксапарин — это современный низкомолекулярный гепарин для снижения густоты крови и для лечения тромбоцита крови.
Мы хотим занять 30% рынка гепарина, но если с нами будут очень активно конкурировать, то займем, условно, 15%. При марже в 300-400%, существующей сегодня в некоторых сегментах фармрынка, конкуренция, конечно, будет усиливаться, и маржа со временем снизится. В любом случае, у нашей отрасли — хорошие перспективы. Ситуация будет примерно такой, как в продовольственном ретейле 10-15 лет назад — быстрое расширение и большие инвестиции.
Спасибо «порвавшему в клочья» курс рубля Бараку Обаме, производить лекарства в России теперь весьма выгодно.
Впрочем, разумеется, проблем всё равно хватает с избытком. Так, например, фарммагнат прямо говорит, что производители лекарств вынуждены вбивать огромные деньги в рекламу на телевидении и в «разъяснительную работу» с врачами, без этого ничего не продать.
Так, разумеется, не должно быть. Во-первых, расходы на рекламу и маркетинг сильно удорожают и так недешёвые лекарства. Во-вторых, спасибо рекламе, пациенты зачастую лечатся откровенно шарлатанскими препаратами, а даже если им повезёт купить правильное лекарство, дополнительно к нему им обычно втюхивают ещё кучу дорогих, но бесполезных пилюль.
В частных беседах врачи говорят, что если бы больным всегда назначали только то, что им нужно, а цены на лекарства назначались соразмерно стоимости их производства, на лекарства больные тратили бы как минимум в 10 раз меньше денег, чем сейчас.
7. Ситуация с АЭС на Украине становится тревожной. Идут опасные попытки заменить российское топливо на американское, возрастает нагрузка на атомные станции, работникам АЭС задерживают зарплату:
Я весьма высоко оцениваю квалификацию украинских атомщиков и верю, что они сделают всё от них зависящее, чтобы предотвратить серьёзную катастрофу. Однако всё же не стоит забывать, что «мирный атом», как поётся в песне у Боярского, «не знает, что он дрессирован».
Кстати, в Бельгии населению сейчас централизованно раздают таблетки от радиации (с высоким содержанием йода):
http://www.interfax.ru/world/506532
Может быть, власти Бельгии знают что-то такое, чего не знаем мы? Может быть, таблетки от радиации следовало бы централизованно раздавать и России, хотя бы тем, кто живёт в пятисоткилометровой зоне от границы с Украиной?
8. По итогам 2015 года в каждой пятой семье американцев не работал никто:
https://aftershock.news/?q=node/391549
Представляете, 16 миллионов семей, которые живут на пособие! Нет, в России такие, конечно, тоже есть — но это всё же обычно или пенсионеры, имеющие полное право на заслуженный отдых, или откровенные маргиналы, или ещё несколько особых случаев.
В США же семейная безработица стала массовой. Это, конечно, не слишком хорошо сказывается на здоровье общества.
9. Смертность от самоубийств в России упала до самого низкого за последние 56 лет уровня:
http://www.rusfact.ru/node/52467
Мне интересно, как это объяснят любители поностальгировать по СССР? Неужели жизнь в Советском союзе, с бесплатными квартирами, которые раздавали всем подряд и изобилием продуктов питания на прилавках, не была такой сладкой, как принято считать в определённых кругах?
10. В продолжение темы тонущей Японии. Японский печатный станок выкупил уже больше половины всех ETF — торгуемых на бирже фондов:
https://aftershock.news/?q=node/391554
Для понимания скорости деградации: ещё в 2010 году у Банка Японии не было акций этих фондов вовсе.
Финансовый сектор Японии разрушается прямо на глазах. Ещё немного, и Банк Японии останется единственным игроком на биржах — со всеми вытекающими отсюда печальными последствиями в виде, например, гиперинфляции.
fritzmorgen.livejournal.com
Интернет: Интернет и СМИ: Lenta.ru
В начале мая 2015 года на YouTube-канале Primitive Technology появилось первое видео: безымянный автор изготовил инструменты и построил мазанку в дикой глуши Северной Австралии. Спустя два года ролик посмотрело более 18,7 миллиона человек, а за жизнью сурового блогера следят четыре миллиона фанатов. «Лента.ру» выяснила, чем автор Primitive Technology покорил сердца людей и сколько на этом заработал.
Случайному зрителю канала Primitive Technology наверняка покажется, что он нарвался на западную копию российского специалиста по выживанию Тимофея Баженова или, не дай бог, на клона «выживающего любой ценой» британского путешественника Беара Гриллса. Правда, в отличие от популярных ведущих, автор Primitive Technology тщательно скрывает свое настоящее имя и вообще не дает интервью.
Из описания его канала следует, что все съемки проходят в штате Квинсленд на северо-востоке Австралии. Там же автор утверждает, что, вопреки уверенности многих зрителей, не живет в лесу, но часто выбирается в дикую глушь, чтобы спокойно работать над проектами. «Я даже ночую здесь время от времени», — рассказывает он. Благо в его районе не обитают опасные хищники, только ядовитые змеи. «Нужно быть предельно внимательным при ходьбе и аккуратно поднимать вещи с земли», — объясняет блогер.
Он также рассказывает, что самостоятельно научился строить примитивные хижины и изготавливать инструменты первобытных людей. «Все мои знания — результат сотен проб и ошибок, плюс тематические книги и, конечно, интернет. Я не из аборигенов и не имею военной подготовки», — признается блогер.
Но главная фишка безымянного героя Primitive Technology — гробовое молчание, сопровождающее все его ролики. «Когда я смотрю видеоинструкции, я всегда проматываю болтовню, чтобы поскорее увидеть само действие. Так что я решил избавиться от голосового сопровождения в пользу визуализации», — подчеркивает автор.
Под каждым роликом блогер оставляет подробное текстовое описание процесса создания того или иного предмета, так что научиться выживать в дикой природе с помощью Primitive Technology все же можно.
Блогер использует только натуральные материалы, добытые в дикой природе Северной Австралии. Например, чтобы приступить к постройке хижины с черепичной крышей (у этого видео более 25,8 миллиона просмотров), блогеру пришлось изготовить топор для рубки деревьев, глиняный горшок для обжигания черепицы, каменную стамеску и молоток.
Для каждого инструмента автор записывает полноценную видеоинструкцию, объясняя, как и что он делает. Так, на его канале имеются ролики с процессом изготовления каменного струга, ножа, дымохода, плетеных корзин и глиняного горна.
Блогер увлекается и самодельным оружием для охоты и самозащиты. В его арсенале есть 55-дюймовый (1,25 метра) самодельный лук из оливкового дерева и 60-сантиметровые стрелы с острыми наконечниками, сплетенная из волокон древесной коры праща и метательное копье со специальным рычагом. «Небольшой длины деревянный брус с углублением на конце, куда помещается задняя часть копья: это придает броску дополнительную мощность и увеличивает дальность полета», — говорится в описании ролика.
Наконец, немало времени уделяется добыче пропитания. В одной из видеоинструкций австралиец показывает, как сконструировать ловушку для обитающих в местных водоемах пресноводных креветок, а в другой — как грамотно возделать огород, чтобы посадить и вырастить маниок и батат.
На канале Primitive Technology нет рекламы, и автор, похоже, не сильно стремится монетизировать свой контент. Возможно, ему вполне хватает тех 27 тысяч долларов, которые он ежемесячно получает с коммерческих просмотров. Конечно, если у него вообще подключена партнерская программа с YouTube.
Зато у австралийца есть собственная страница на www.patreon.com, где любой может перечислить деньги на развитие проекта. «С вашей поддержкой я могу превратить свое хобби в полноценную работу. Взамен я обещаю улучшать качество роликов и регулярно выпускать новые видео. А вы сможете побольше узнать про выживание в дикой природе», — предлагает он.
На сайте зарегистрировано более двух тысяч человек, а в кошельке австралийца накопилось более пяти тысяч долларов. Тем удивительнее, что при огромной популярности на YouTube автор постоянно просит деньги у подписчиков. Скорее всего, так происходит из-за отсутствия ссылок на его сайт в описании к роликам.
К тому же ни у него, ни и у проекта Primitive Technology нет собственных страниц в социальных сетях. «У меня нет аккаунта в Facebook, игнорируйте фейки», — отмечает он под видео и добавляет единственную ссылку на текстовый блог WordPress, где дублирует свои записи.
В комментариях восхищенные фанаты справедливо замечают, что большинство людей с головой увязли в новомодных гаджетах и совершенно забыли про примитивные технологии, не знают, как развести огонь или построить шалаш из листьев. «Этот парень пришел из каменного века. Через несколько лет он точно сконструирует компьютер», — уверены обитатели Reddit.
Подавляющее большинство подписчиков не только с радостью смотрит видеоинструкции, но и испытывает глубокое уважение к неразговорчивому австралийцу. «Мужик делает свое дело и не треплется об этом», — емко подметил один из фанатов.
Многие подчеркивают, что Primitive Technology — редкий пример действительно полезного контента на просторах YouTube. Недаром собравший больше всего лайков под одним из роликов комментарий гласит: «Эй, теперь даже я знаю, как построить дом и вырастить гору красного картофеля. Спасибо тебе, молчаливый блогер».
lenta.ru
Первобытные технологии — Часть 1 / 10 Видео — Исторический Петропавловск
Серия отличных роликов, которые кратко и доступно поясняют суть археологических экспериментов, реконструирующих различные первобытные технологии. Для удобства просмотра серия разбита на несколько частей по 10 видео в каждой. Под катом еще 9 серий. Описания пока что на языке оригинала, но по мере появления свободного времени они будут переводиться на русский. Часть 2 >>Часть 3 >>
1. Primitive Technology: Wattle and Daub Hut
(Видео на превью записи)I built this hut in the bush using naturally occurring materials and primitive tools. The hut is 2m wide and 2m long, the side walls are 1m high and the ridge line (highest point) is 2m high giving a roof angle of 45 degrees. A bed was built inside and it takes up a little less than half the hut. The tools used were a stone hand axe to chop wood, fire sticks to make fire, a digging stick for digging and clay pots to carry water. The materials used in the hut were wood for the frame, vine and lawyer cane for lashings and mud for walls. Broad leaves were initially used as thatch which worked well for about four months before starting to rot.
The roof was then covered with sheets of paper bark which proved to be a better roofing material (*peeling the outer layer of bark does not kill this species of tree). An external fireplace and chimney were also built to reduce smoke inside. The hut is a small yet comfortable shelter and provides room to store tools and materials out of the weather. The whole hut took 9 months from start to finish. But it only took 30 days of actual work (I abandoned it for a few months before adding bark roof, chimney and extra daub ).
2. Primitive Technology: Thatched Dome Hut
Добавлено: 8 мая 2015 г.
I built this thatched dome hut on a mountain ridge using completely primitive tools and materials. The frame was 2.5 m in diameter and 2 m tall. It was made from 8 thin saplings 2.75 m long, the thatching material was split palm fronds and vine was used for tying it all together. A stone hand ax was used to chop the saplings and a sharp stone flake was used to cut fronds. The pointed dome profile is half way between a spherical dome and a ti-pi. This shape sheds rain and funnels smoke effectively while still providing a large inner volume. A moat was dug around the hut to drain water away. As an afterthought I planted sweet potatoes and taro around the moat to hopefully provide some food later on.
3. Primitive Technology: Firesticks
Добавлено: 15 мая 2015 г.
Making fire sticks primitively from scratch, making a fire using the sticks and making and firing a small pot to test clay from the hut.
The species of wood used for the fire sticks is ‘Abroma mollis’. In the hibiscus/cottonwood family (Malvaceae).
4.Primitive Technology: Stone Axe (celt)
Добавлено: 22 мая 2015 г.
The manufacture of a stone ax including the handle from using only primitive tools and materials. It is a celt (pronounced «selt») a type of ax with a polished stone head wedged into a hole or mortise at the end of a wooden handle (not to be confused with a «Kelt» referring to a Celtic person). The head took about a week and a day to make as I chose to make it from a particularly large piece of basalt. The hammer stone used to shape the basalt was of quartz. This involved hammering, pecking, grinding and polishing the head into the final shape. The handle took a day and a morning to make. A chisel was made from stone and a mallet made from a log. These were used to cut the tree for the handle and shape it once down. Fire was used to harden the wood and also to help shape the mortise. The ax was then used to cut down a tree the day after the handle was a tree itself. It is a more efficient tool for felling trees than the hand ax I made and at the time of uploading this video has cut down 4 trees which I will use later. Because this stone axe is blunter than a steel one, the blade needs to hit the tree at angles greater than 45 degrees- otherwise the blade would glance off. So celts were used more like wedges than modern axes.
5. Primitive Technology: Making poisonous Black bean safe to eat (Moreton Bay Chestnut)
Добавлено: 29 мая 2015 г.
Cooking and leaching Black bean to remove the poison making it safe to eat. A basket was made to leach the poison out in a stream. Also shown are Atherton Oak nuts. The Aboriginal artifacts found near by were probably made by the Yidinji people (if you’re reading this leave a comment below). It seems like a lot of effort to prepare black bean to eat but consider the effort that goes into making bread from scratch (plowing, sowing, winnowing, storing, milling, baking etc.). With Black bean it is collected when needed, storage is unnecessary as nothing eats it raw and it can be left in the stream till needed. It contains more energy than potatoes(but less than grain) and contains lots of starch and protein. This was a staple food of the rain forest people once.
IMPORTANT EDIT: Always do an edibility test before consuming new bush foods. I left the Moreton bay chestnuts to soak in the running stream for a week (because I was busy) but it only takes 3 days to leach out the poison making it safe to eat.
I estimate that 200 Moretonbay chestnut seeds alone would meet the energy requirements of an adult for 3 days. If you prepared this food on a continuous 3 day cycle it would be as follows: Collect fire wood, get the grated meal soaking in the stream from 3 days earlier, bake it into bread, collect 200 new seeds, bake them in a pit till soft, grate or slice them finely into the basket and put it back into the stream for 3 days. The bread made from this easily stores for 3 days. So you spend one day (probably only the morning) making the food and the other 2 days free for other activities.
6. Primitive Technology: Stone Adze
Добавлено: 26 июн. 2015 г.
The video shows the construction and use of a stone adze.To put this video in context, the dome hut you see in the video is in the same spot as the wattle and Daub hut is today- only 2 years earlier (first started filming these builds). I shaped the head from basalt using a hammer stone to roughly shape it (pecking) and a grind stone to polish it (grinding). I used an L shaped piece of wood to form the handle, carving a backrest to absorb the shock of each strike and lashed the stone to the handle using lawyer cane. I then cut down two trees and a sapling to demonstrate the time taken to use it (note-this land is an abandoned cane farm and not virgin forest). I would say that a stone adze is easier to make than a celt ax and is also quite effective at felling trees. The stone adze was the all purpose wood working tool in Papua New Guinea and favored over axes by most canoe building cultures. Later I discarded the adze, demolished the dome and built the wattle and daub hut without any previous technology I made- just to see if I could.
7. Primitive Technology: Wood shed and Native bee honey
Добавлено: 3 июл. 2015 г
It has been raining here quite a bit in what should normally be the dry season. The wattle and daub hut is standing up well despite this (see video). However this has held back some other projects I had planned. So I decided to build a wood shed across the creek in Eucalypt woodland (where the best firewood is). Keeping firewood dry cuts down the amount of firewood needed and decreases the amount of smoke produced. Also keeping the firewood in an external structure saves room in the hut and leaves no place for snakes and rodents to hide. The shed is simply a 1 x 1 m thatched hut with a lower area used to store fire wood (1 cubic meter) and an upper level for storing fire starting equipment (fire sticks, tinder, stone blades for carving new holes in the sticks). I built it using wood from a previous hut to save effort and trees. It is tied together with lawyer cane and thatched with large palm leaves- These are a poorer quality than those in the mountain and will probably need replacement in a few months. I keep a large stone in front of the shed to break firewood over to save effort. Also while looking for fire wood I came across a fallen native sting-less bee hive. I ate some honey from it and stored it on the fireplace out side the hut. This keeps it sheltered from the rain, exposes it to morning sun to keep it warm and keeps it away from ants. In return perhaps the bees will produce honey (1 kg/year) and wax that I may use.
8. Primitive Technology: Palm Thatched Mud Hut
Добавлено: 20 июл. 2015 г.
This is an old hut I built 2 years ago and have since demolished. It was a 2 m square floor with wattle and daub walls 1.5 m high topped with a pyramidal roof thatched with Alexander palm fronds. The building method is my usual plan- get a roof up first then build the walls. From start to finish it took 27 days (it could have been faster though- this was at a casual speed). This was the first wattle and daub hut I built and is larger than the other one I built later (my idea for now is to build small but well although I’ll try larger huts again in future).
The roof lasted for a few months before becoming rotten and bug eaten. As an important note the species of palm used in thatching makes all the difference. Had this hut been built in the mountain with wait-a-while palm fronds it would have lasted 2 years at least.Instead it was thatched with alexander palm fronds that deteriorated quickly.
I wasn’t to know this and was trying to adapt hut building practice I learned in the mountain to low land conditions (I’ve built similar huts up the mountain with the same roof shape that have lasted a long time). I hope in future videos to explore better roofing options to use in areas like this.
Also of interest in the video is another pot I make showing more detail than previous videos. The fire place for the hut is a simple pit in the center of the floor. It is a good hut design though it requires a simple ladder to construct.
9. Primitive Technology: Tiled Roof Hut
Добавлено: 4 сент. 2015 г.
I built this tiled roof hut in the bush using only primitive tools and materials. The tools I used have been made in my previous videos. It should be pointed out that I do not live in the wild and that this is just a hobby. It should be obvious to most that this is not a survival shelter but an experiment in primitive building technology.
To cut and carve wood I used the celt stone axe and stone chisel made in this video. To carry water and make fire I used pots and fire sticks made in this video. Finally, to store fire wood and dry, unfired tiles, I used the wood shed built in this video.
The wooden frame was built with a 2X2m floor plan and a 2m tall ridge line with 1m tall side walls. 6 posts were put into the ground 0.25 m deep. The 3 horizontal roof beams were attached to these using mortise and tenon joints carved with a stone chisel. The rest of the frame was lashed together with lawyer cane strips. The frame swayed a little when pushed so later triangular bracing was added to stop this. Also when the mud wall was built, it enveloped the posts and stopped them moving altogether.
A small kiln was built of mud from the ground and a perforated floor of clay from the creek bank. It was only 25 cm internal diameter and 50 cm tall. Clay was dug, broken tiles (from previous batches) were crushed and added to it as grog and it was mixed thoroughly.This clay was pressed into rectangular moulds made from strips of lawyer cane to form tiles. Wood ash prevented the clay sticking to the stone. 20 tiles were fired at a time. 450 flat tiles and 15 curved ridge tiles were made with only a few breakages. 26 firings were done in all and the average firing took about 4 hours. The fired tiles were then hooked over the horizontal roof battens.
An underfloor heating system was built into one side of the hut to act as a sitting/sleeping platform in cold weather. This was inspired by the Korean Ondol or “hot stone”. A trench was dug and covered with flat stones with a firebox at one end and a chimney at the other for draft. The flames travelled beneath the floor heating it. After firing it for a while the stones stay warm all night with heat conducted directly to the sleeping occupant and radiating into the room.
The wall was made of clayey mud and stone. A stone footing was laid down and over this a wall of mud was built. To save on mud, stones were included into later wall courses. The mud was dug from a pit in front of the hut and left a large hole with a volume of about 2.5 cubic metres.
The finished hut has a swinging door made of sticks. The inside is dark so I made a torch from tree resin. A broken tile with resin on it acts as a small lamp producing a lot of light and little smoke. The end product was a solid little hut, that should be fire and rot resistant. The whole project took 102 days but would have taken 66 days were it not for unseasonal rain. For a more in depth description see my blog
10. Primitive Technology: Chimney and pots
Добавлено: 30 окт. 2015 г.
I installed a fireplace and chimney in the tiled roof hut. This is for for lighting and cooking. Heating is already taken care of by the underfloor heating system. I knocked a hole in the back wall and made it from the same mud used to build the hut. Some left over roof tiles were used as a chimney cap.
I made same pottery too. Clay was dug from the creek bank, mixed with broken crushed tiles as grog and formed into a cooking pot and 4 large water pots. I burnished them (rubbed till smooth) with a snail shell and a seed pod making them stronger and more water proof. Then I fired them in the tile kiln. The kiln fired pottery was larger and stronger than my previous pit fired pots and also had a lower breakage rate with only one of the five pots breaking.
I used the water pots to carry water from the creek to irrigate a sweet potato patch behind the wattle and daub hut (over the creek from the tile hut). The cooking pot was used to boil creek water. I used two different methods to show how to boil water: 1) in the kiln using it like a stove and 2) using pot boiling stones from the fire place. Boiling the water with rocks was faster than boiling a pot over a fire. Wooden tongs were made and rocks were put in the fireplace till they glowed red hot. The rocks were then put in the cold water in the pot. It only took 4 rocks to boil the water violently. This is probably the best method for sterilizing suspect water for drinking and could be done even without a pot (even a puddle next to a creek could be boiled this way).
Оцените материал:
history1752.su
Первобытные технологии — Часть 3 / 7 Видео — Исторический Петропавловск
Серия отличных роликов, которые кратко и доступно поясняют суть археологических экспериментов, реконструирующих различные первобытные технологии. Для удобства просмотра серия разбита на несколько частей по 10 видео в каждой. Под катом еще 9 серий. Описания пока что на языке оригинала, но по мере появления свободного времени они будут переводиться на русский.
Часть 1 >>Часть 2 >>
1. Primitive Technology: Spear Thrower
(Видео на превью записи)A spear thrower is a simple tool that allows the user to throw a spear further than by hand alone. It is a small length of wood with a hook in the end that fits into a notch in the back of the spear. The extra power and distance gained by the thrower is due to the extra leverage it gives.
I cut a small branch with a minor branch coming off the side. I shaped the minor branch into a spur to fit into the end of the spear. The thrower was about 65 cm long.
For the spear, I cut a thin sapling approximately 2 m long and about 1.5 cm thick. I carved a cup in the end of the spear for the spur to fit into. Then I bound the back of the spear with bark fiber to prevent the wood from splitting. The head of the spear was simply charred in the fire and scrapped against a rock to sharpen it (during practice the head regularly breaks so only a sharpened tip is used to save work).
To use the spear thrower, the spur of the thrower is inserted into the cup of the spear. The spear and thrower are held at about shoulder height. The thrower is quickly flicked forward and the spear propelled towards the target. As the spear leaves the thrower it bends slightly storing energy until it jumps of the spur. During flight, the flexible spear wobbles and oscillates paradoxically giving the spear some stability in flight.
The throws in the video show what can be done in one afternoon of practice (my arm got sore and I wanted to start on other projects). I hit the target a few times at a distance 15 m. It is more powerful than a spear thrown by hand alone but is difficult to learn. The spear I made could have been a fraction lighter and so would have greater speed. Another improvement would be to add flights to the spear so it would be more accurate and fly straighter (like an atlatl).
The extra energy gained from a Woomera’s (Australian spear thrower) use has been calculated as 4 times that of compound bow (Wikipedia). It’s easy to make (this took less than a day) but requires lots of training to become accurate.
2. Primitive Technology: Freshwater Prawn Trap
Добавлено: 4 ноября 2016 г.
I built a prawn trap from lawyer cane, sticks and vine. Then I caught some prawns and ate them.Prawn (and fish) traps are simple traps designed to catch aquatic life due to their shape. It consists of a simple basket with a funnel shaped entrance. Prawns easily find their way into the trap as they are funneled in, but have difficulty finding the way out.I wove the main body of the trap from lawyer cane then made the funnel from sticks with vines woven between them. The funnel was then inserted in the top of the basket and was complete.I put the trap in the water under some tree roots without any bait. About 10 minutes later caught the first prawn which I stored in a pot of water. I caught another one and made a fire.I humanely killed the prawn using the splitting method which destroys the central nervous system (boiling alive is more painful). Then I put them back in the pot with water. I collected some yams that I planted years ago from wild stock and put them in too.I took 5 hot rocks from the fire and put them in the pot boiling the contents. The prawns turned red after cooking. They were peeled and eaten. The yams were also peeled and eaten.This method of catching prawns is easy with the only skill needed being basketry. In practice, a long stretch of creek might have several traps collecting food each day without any effort on the part of the fisherman. Bait is not necessary to catch prawns as they will be naturally be drawn to the fish trap out of curiosity. But scraps from previous prawns may be used to bring in new ones (they are cannibalistic) or other fish like eels. The prawn trap is easy to build and can be reused many times.Edit: I originally called this animal a shrimp when technically it is a freshwater prawn. A prawns segments overlap the ones after it whereas a shrimps second segment overlaps the first and third segment. Shrimp have a distinct bend in the tail. It is definitely not a crayfish however which is basically a freshwater lobster.
3. Primitive Technology: Bed Shed
Добавлено: 27 января 2017 г.
I built a bed shed, a small shelter with a sleeping platform built into it. It’s quicker to build than a large hut but can be extended later on when materials and time become available. It’s not far from the dome shaped grass hut I built earlier. The hut took about 2 weeks to make only because it’s difficult to find grass in the mountain (if built in a field it would be significantly faster).The hut is 2 m long and 1 m wide. Four posts were hammered into the ground, two 1 m high posts (1.25 m long, 25 cm underground) on the low side and two 2m high posts (2.25m long, 25cm underground) on the high side. Onto this, a sloping rafters was lashed on with fish tail wait-a-while, a spiky palm with a vine like habit. To remove the needle like spikes from the plant, the leaves are pulled off so that the frond sheaths come with them. This made suitable lashings.Battens were then tied to the rafters and bundles of long grass from the mountainside were collected. Using vine from the bush, the bundles were lashed to the battens starting at the low side and continuing to the top so that the grass would shed rain. Cross bars were lashed to the frame of the shed at each end to support the bed. These were at a height of 1m above the ground.The bed frame itself was made from four poles (two 2m long and two 75 cm long) lashed together to form a rectangle 1.75m long and 75 cm wide (the ends of the two longer poles extending further to sit on the cross bars in the shed). Lawyer cane was then wrapped length ways over the frame to create horizontal threads. Then more lawyer cane was woven between these threads to form a sort of bed spring net. The bed frame was then put on the cross bars and tested to see if it could hold my weight. A mat I made from woven bark in a previous video was used for bedding and a bunch of grass for a pillow. In a rainstorm it was possible to make a fire in the space under the bed.This structure is quick and easy to build. The bed is 1 m above the ground and provides plenty of area beneath to store fire wood and tools out of the rain as well as a place to sit and make things. The bed is comfortable and keeps the occupant off the ground away from ground dwelling creatures at night. The smoke coming up from the fire keeps mosquitoes away while providing heat and light reflected back from the roof. In fine weather the fire can be placed in front of the shed in the open while during rain the fire can be kept under the shelter to keep it dry. If room is needed to stand up the bed can be folded up against the roof and tied to it using cordage.This shed is literally one half of the standard rectilinear hut I usually build (2m x2m floor plan, 2m tall ridge line and 1 m high side walls e.g. from wattle and daub hut and tiled hut videos) and was built to be upgradeable. Later, the other side of the roof could be added on and then walls of some kind built around the frame to form a full hut.
4. Primitive Technology: Planting Cassava and Yams
Добавлено: 24 февраля 2017 г.
In this video I build a garden to grow Cassava and yams, two staple food crops. Cassava is a shrub that develops large edible roots. Yams are a climbing vine that produce large, edible underground bulbs and smaller aerial bulbs on their vines.I had 5 huts, but the wattle and daub hut (from the first video uploaded on this channel nearly 2 years ago) became dilapidated. I abandoned it in favour of the other huts I built and neglected the roof. This let water in destroying a wall. Also, the sweet potato patch behind it had a tree fall across it destroying the fence. So I demolished them both to make one large garden.After removing the fence I set a fire under the fallen tree to burn it in half rather than spend the effort of cutting it with stone tools. After burning almost all the way through, it rained. So I came back later and cut through the rest of the log with stone tools. I eventually broke the tree in half. Using smaller logs as levers I moved the tree out of the garden clearing the space for the garden.I then collected wood and built a simple fence that was woven loosely together with vine. The fence needs only to discourage large animals from entering to prevent them causing damage. Most times pigs and wallabies don’t know that food is growing in the garden and won’t try and enter if they see no reason to. Or at least that worked for the sweet potatoes so we’ll see if it works this time.For the yam and cassava planting material I travelled far down stream to the site of my old stone hut that I built over 10 years ago. It had a corbelled dome roof that was damaged when a tree fell on it during a cyclone and it came down a few months later. The thick walls however have stayed standing for about a decade though.Yams and cassava grew wild at this site which is one of the reasons I built the stone hut there. These plants are not native to Australia but grow wild here after having escaped from people’s gardens (similar to how wild pigs live here now after escaping from farms). The planting material for the yams are the bulbs that grow on the vines. The planting material for cassava are simply 25 cm long pieces of stem.On returning to the garden, a scrub turkey was seen digging in the mounds. Protected by law, this bird has lost its fear of humans and in this case I’ve semi-domesticated it. Originally it was attracted to soil I dug up for the worms it exposed. I started leaving a pot out with small sweet potatoes in it for it to eat and now it investigates any pottery I leave for food. Now it visits my projects and will only leave if bored or chased away. I suppose this is similar to how chickens were domesticated, in fact bush turkeys and chickens are related and will produce hybrid offspring.Unfortunately, it has learned that the garden contains food. Originally, I was only going to plant yams but I saw the turkey digging them up and eating them. So, I planted cassava in the mounds so that the turkey would be discouraged by finding only wooden stems to peck at. I secretly planted the yams along the fence of the garden because the turkey only thinks the mounds contain yams. They can’t smell very well and only find food by sight and learned behavior.I planted the cassava in mounds 1 meter apart by pushing them flat into the soil. I planted the yams at intervals along the fence so they could use it as a trellis. 32 cassava stems and 12 yams were planted. Then a storm began and watered the garden. In less than a week the cassava had sprouted shoots and began to grow. The yams will take longer as I planted them deeper.Cassava produces the most calories per time and space of any plant apart from sugar cane and sugar beet. But it requires much less fertiliser and effort. A hectare of cassava produces enough calories in 2 days to sustain a person for 1 year. It takes a year to come to harvest but will stay in the ground for a year without becoming woody. The tubers are high in starch and are what tapioca is made from.This variety is called sweet cassava (actually not bitter cassava, it doesn’t taste sweet but starchy instead) and it needs to be boiled for 20 minutes to get rid of some cyanide it contains. The bitter variety contains such high levels that it kills if eaten raw and requires more extensive treatment to eat. There isn’t much nutrition in cassava other than the large amount calories it contains so other food would be required to provide protein and nutrients.After I harvest the cassava I planted I’ll try fermenting it (which adds nutrition), drying it and pounding it into flour to make flat bread. Cassava flour has the same energy content as wheat flour, stores well and tastes somewhat similar. Or I could just cook it and eat it straight from the garden. I’ll use the yams like potatoes when they’re ready.
5. Primitive Technology: Посуда из термитной глины
Добавлено: 24 марта 2017 г.
Я построил эту гончарную печь и сделал посуду из глины термитника, чтобы протестировать альтернативный моему обычному (из ручья) источник глины. Я начал с постройки большой решетки из обычной глины. Она была чуть меньше 50 см в диаметре. Затем я взял сухие куски термитника и положил их в яму перед хижиной, покрытой черепицей. Куски были измельчены и к ним была добавлена вода для смачивания глины. Чтобы перемешать глину, я растоптал ее. Сухие пальмовые листья были добавлены в глину, чтобы предотвратить ее растрескивание, когда она высохнет, и чтобы дополнительно изолировать печь. Я снова перемешал смесь, а затем вынул ее из ямы. Была вырыта траншея, чтобы образовать топку печи, а в передней части траншеи была сделана стенка из глины. Было выкопано в отверстие в стене, чтобы поток воздуха попадал в топку.Решетка была помещена поверх топки, а стены вещевой камеры были установлены вокруг решетки. Когда стены печи были закончены, решетки из термитной глины были помещены в топку. Решетки важны, поскольку они поднимают дрова над землей, позволяя воздуху перемещаться вверх через топливный слой для более эффективного сгорания. Сжигание древесины в виде кучи на земле позволяет холодному воздуху течь вверх и по углям, охлаждая печь и оставляя воздух неиспользованным в реакции с деревом. Это работает, но гораздо менее эффективно, чем с использованием решёток. Готовая печь была высотой 50 см (выше высоты колосниковой решетки), диаметром 50 см и толщиной около 12,5 см. Топка была около 25 см в глубину и 25 см в ширину с решетками, сидящими на полпути между землей и круговой решеткой для печей выше.Затем, для глиняной посуды, я выбрал термитник, построенный на красной глинистой почве. Я отнес его к печи ,намочил его водой и перемешал в небольшой яме. Я сломал старую решетку из предыдущей печи и смешал ее с термитной глиной, чтобы получить шамот. Шамот предотвращает растрескивание керамики при сушке и помогает предотвратить расколы при обжиге. Затем я сформировал из глины маленькую урну. Я также сделал несколько плит черепицы и маленький горшок из термитной глины. Затем я уложил посуду из термитной глины в печь.Чтобы обжечь глиняную посуду, я собрал большую кучу дров и начал разжигать огонь в топке. Я услышал треск в печи на ранней стадии и знал, что что-то сломалось, но продолжал в любом случае. Через час печь нагрелась хорошо, и керамика раскалилась докрасна. К второму часу температура понизилась, что иллюстрирует важный момент: если вы заполните топку дровами, печь закупорится и не будет гореть эффективно. Понимая эту ошибку, я просто позволил дереву немного сгореть , чтобы воздух мог пройти. К 2 часам и 30 минутам печь снова хорошо горела и керамика, светилась темно-оранжевым (около 845°C или 1550°F градусов). Я держал её при этой низкой температуре обжига еще 30 минут. Весь процесс обжига занял около 3 часов от начала до конца — относительно короткий период времени для обжига гончарного изделия.Когда я достал глиняную посуду,то увидел ,что одна плитка сломалась, а урна раскололась (кусок наружного слоя откололся ), возможно, из-за того, что в ней всё таки была влага. Урна все еще была пригодна для использования, и я использую ее для полива ростков маниоки. Кузнечная воздуходувка была хорошо обожжена и теперь устойчива к воде и больше не нуждается в тщательной защите от дождя. Я положил воздуходувку под навес для хранения. Я положил сломанные плиты и отколотую часть урны в специальную кучу для разбитой глиняной посуды. Когда в будущем я буду делать керамику , я могу раздробить эти разбитые куски и смешать их с новой глиной как шамот, чтобы укрепить новые керамические изделия. Наконец, я сохранил хорошие плитки за черепичной хижиной ,на бочке в качестве замены для сломанной черепицы в крыше, если там она будет повреждена в будущем.Термитная глина является хорошим материалом для изготовления печей и хорошим заменителем глины для керамических изделий, если не найдется лучший источник. В результате глина очень гладкая и пластичная. Она слишком гладкая на мой вкус, я привык работать с более грубой глиной, в которой есть ил, смешанный с ней естественным образом. Я считаю,что термитная глина и слишком жидкая, когда мокрая, и трескается легко при сушке. Было трудно сформировать из нее сложные формы, мне потребовались 2 попытки для того чтобы сделать урну. Но для формирования таких объектов, как черепица, она подходит идеально, так как она может быть легко сформирована, и удержит форму. В будущем я бы, скорее всего, использовал термитную глину для массового производства формованных объектов, таких как кирпичи, черепица, простые горшки (сформированные по шаблону) и, возможно, трубы, и тем самым сохраню истощающийся источник глины из ручья для более сложной керамики. Термитная глина может быть использована для производства несложной керамики, если нет другого источника.
6. Primitive Technology: Water powered hammer (Monjolo)
Добавлено: 28 апреля 2017 г.
I built a water powered hammer called a “Monjolo” (see also karausu (からうす) on google images). I started by making a water spout from half a hollow log to direct water from the creek. This was set up in the creek and water flowed through it. The hammer was made from a fallen tree. I cut it to size by burning it at the points I wanted it cut (to save effort chopping). Next I carved a trough in one end to catch falling water. This was done first with a stone chisel that was then hafted to an L–shaped handle and used as an adze. This adze only took about an hour to make as I already had the chisel head and cordage made of bark fibre to bind it with.To save further effort carving I used hot coals from the fire to char the wood in the trough. I put the coals in using “chopsticks” (unused arrow shafts) to transfer them from the pit. The coals were fanned or blown with a wooden blowpipe till the wood in the trough burned. Then the char was scraped out. The sides of the trough were sealed with clay to make sure the wooden sides did not burn away which would effectively decrease the volume of the trough. This was approximately 8 hours work over two days.With the trough carved I made a hole in the middle of the log as a pivot point. Using the same char and scrape method I burnt a hole right through the log using hot coals and a blow pipe. Again clay was used to prevent wood burning where it was wanted. To burn through the approximately 25 cm diameter log it took about 4 hours and 30 minutes. Another hole was burnt in the end to fit the wooden hammer head and it took a similar amount of time.A tripod lashed with loya cane was set up at the water spout. The axel of the hammer was tied to one leg, the hammer fitted onto the axel and the other end of the axel tied to another leg. The trough was positioned under the waterspout to collect water and the tripod adjusted so that the resting point of the hammer was horizontal (so water wouldn’t prematurely spill out of the trough).The trough filled with water, outweighed the hammer head and tilted the hammer up into the air. The water then emptied out of the trough (now slanting downwards) and the hammer then slammed down onto an anvil stone returning to its original position. The cycle then repeated at the approximate rate of one strike every 10 seconds. The hammer crushes small soft types of stone like sandstone or ochre. I carved a bowl into the anvil stone so that it would collect the powder. I then crushed old pottery (useful as grog for new pots) and charcoal. Practically speaking, this hammer worked ok as a proof of concept but I might adjust it or make a new one with a larger trough and bigger hammer for heavy duty work.This is the first machine I’ve built using primitive technology that produces work without human effort. Falling water replaces human calories to perform a repetitive task. A permanent set up usually has a shed protecting the hammer and materials from the weather while the trough end sits outside under the spout. This type of hammer is used to pulverise grain into flour and I thought I might use one to mill dry cassava chips into flour when the garden matures. This device has also been used to crush clay for porcelain production. A stone head might make it useful as a stamp mill for crushing ores to powder. It might pulp fibres for paper even.
7. Первобытные технологии: многоразовая печь для древесного угля
Добавлено: 17 июня 2017 г.
Древесный уголь — это ценное топливо, которое даёт более высокую температуру, чем само дерево из которого он сделан. Я раньше уже сделал некоторое количество, но поскольку запасы истощались из-за опытов с печью, я решил сделать еще одну большую партию угля в насыпи. Я сложил дрова в подобие конуса (около 1 м в ширину и 75 см в высоту), а потом построил толстую стену из грязи вокруг кучи (это заняло 6 часов). В основании насыпи были сделаны восемь воздухозаборников и одно выходное отверстие было оставлено на вершине, чтобы позволить летучим составляющим из древесины покинуть её, и в то же время создать естественную тягу, поддерживающую горение.
Печь была зажжена и пламя пошло сверху вниз в направлении, противоположном тяге. Это защитило уголь от преждевременного сгорания, так как углекислый газ проносится мимо вместо кислорода, предотвращая сгорание угля. Каждый воздухозаборник был запечатан только тогда, когда огонь стал виден через них. Это простой способ, чтобы определить, когда их надо закрыть, т. е. когда вся куча дров прогорела. Когда последний воздухозаборник был закрыт, выход воздуха на вершине насыпи был также запечатан спустя 5 часов после запуска. На следующий день, когда всё остыло, был сделан большой арочный проем в насыпи, чтобы извлечь уголь. Несмотря на несколько не сгоревших головешек, качественного угля на выходе хватило почти на 2 корзины.
Чтобы проверить, можно ли использовать печь повторно, я заново заполнил ее древесиной, нарубленной из упавших веток эвкалипта, который растет на горе. Из-за трудностей доступа внутрь печи, я сложил дрова горизонтальными слоями крест на крест. Отверстие было запечатано грязью и печь подожжёна, как и в прошлый раз. На этот раз горела быстрее, – древесина горела с другой скоростью и мне пришлось запечатать печь раньше, через 3 часа после поджига. Некоторые крупные брёвна остались неcгоревшими, в то время как древесный уголь, который уже сформировался, начал впустую сгорать в пепел.
На следующий день, когда я открыл насыпь, печь хоть и произвела порядочное количество угля, но его оказалось удручающе меньше по сравнению с первой партией. Это может быть частично связано с тем, что некоторые дрова были еще зелеными, но скорее всего причиной стало то, как они были сложены. Урок заключается в том, что при изготовлении древесного угля древесину нужно плотно укладывать с небольшим количеством зазоров между ними. В противном случае куча забирает слишком много кислорода, который быстро сжигает древесину.
Другим предположением было то, что древесина может преобразовываться в уголь лучше, если уложена вертикально (или примерно так, как конус в первом костре), — таким образом, что огонь начинается в верхней части дерева и горит вниз. Укладка древесины в горизонтальных слоях означает, что каждый слой должен поджигать слой под ним, что затруднено, если дерево зеленое (надлежит использовать сухую древесину при укладке по горизонтали). Уложенные вертикально, дрова будут подожжены уже вначале, и будут гореть вниз в сторону воздухозаборников. Подобный способ укладки позволяет легче увидеть огонь в отверстиях для воздуха чтобы знать, когда их нужно закрыть.
По вышеизложенным причинам я, возможно, сделаю в будущем ещё одну углевыжигательную печь в форме цилиндра с воздушными вводами вокруг основания и открытым верхом. Печь будет многоразовая и легкая для укладки. Коническая кучка дров будет выступать над стенами печи и будет залеплена временной крышкой из грязи. Печь будет поджигаться так же, как и обычная в виде холма, а временная крышка из грязи будет удаляться по завершении для извлечения угля.
Оцените материал:
history1752.su
Проверяем первобытные технологии
— Энцефалит, болезнь Лайма, геморрагическая лихорадка — специалист по выживанию Сергей Гращенко буднично перечисляет возможные последствия укуса клеща. Отказываться от похода в лес на тот момент было уже поздно: мы проехали около 70 километров до Налибокской пущи. Осталось только затянуть носки повыше на джинсы и особо тщательно облить ноги спреем против всякой живности. Оператор надел кепку и для надежности закутался в капюшон — клещи вроде как с деревьев не падают, но вдруг они поумнели? Нас ждал день в лесу практически в первобытных условиях: никаких мобильников, GPS-трекеров, компасов и зажигалок. Только нож и тяга к выживанию.
То и дело слышишь, что городские жители совсем никудышные: окажись разбалованные минчане за пределами уютного МКАДа, так и пропадут с концами. Мы решили это проверить, а заодно испытать первобытные технологии — добыть огонь без спичек, сориентироваться на местности, очистить воду подручными средствами и так далее.
Мох и часы
Сергей говорит, что в незнакомой обстановке начинать всегда нужно с ориентирования. Первым делом решено проверить старую байку: якобы мох растет всегда на северной стороне дерева. В интернете встречаются доводы как за, так и против этого метода. Оглядываемся: практически на каждом дереве есть хоть немного мха, причем он растет по кругу ствола.
— Ищи там, где его больше, — советует Сергей. Находим кандидата: одна сторона дерева густо заросла мхом, а на других его практически нет. Сверяемся с компасом: мох растет действительно на север. Миф работает? Идем к другому дереву: теперь мох указывает на восток. В третьем случае снова мимо — куда-то между югом и востоком. Сергей сразу предупреждал, что этот метод не работает и вообще непонятно откуда взялся: в реальных условиях полагаться на него нельзя.
С погодой повезло: облака не закрывали солнце. Новый способ гораздо надежнее, говорит наш эксперт. Берем наручные часы и становимся с ними так, чтобы часовая стрелка по направлению указывала на солнце. Дальше делим пополам угол между этой стрелкой и отметкой на один час. Получившаяся линия будет указывать на юг. Дальше все просто: справа запад, слева восток, ну а сзади — север.
Когда у нас ничего под руками нет, придется двигаться строго по прямой линии в одном направлении. Разводим руки на 180 градусов и ищем два дерева, которые будут находиться на одной линии. Идем от одного к другому и повторяем процедуру. С таким методом скорость передвижения намного ниже, но хоть не заблудитесь. Здесь уже подумалось, что эксперт излишне мудрит: в конце концов, можно просто идти по прямой, и хоть куда-то да выйдешь. Сергей улыбнулся и предложил проверить наш вариант.
Дано: поле, наивный я и стоящий метрах в пятидесяти специалист по выживанию. Нужно всего-то дойти до него с закрытыми глазами по прямой. Зажмуриваюсь, для верности прикрываю ладонями глаза и иду, как мне кажется, строго в одном направлении. Спустя минуту кажется, что вот-вот наткнусь на Сергея, но все никак не. Открываю глаза: я прошел буквой U и вернулся на ту же тропинку, с которой начинал. Еще секунд двадцать, и описал бы ровный круг.
Сергей утешает: так у всех людей. Различается только сторона — одних тянет влево, других вправо. Понятно, что с открытыми глазами нет проблем пройти по прямой около 50 метров, но если увеличить масштаб до 10—15 километров, то человек незаметно для себя начнет смещаться в сторону и в итоге придет к исходной позиции. Просто с закрытыми глазами внутренний ориентир сбивается намного быстрее. Поэтому грибников и ищут сутками напролет, хотя в Беларуси сложно найти лес, из которого за день не выберешься.
Делаем шалаш и искрим огнивом
Но как быть, если заблудился к вечеру? Специалист настаивает: нужно готовиться к ночевке, а не искать выход — в темноте если на хищника не нарвешься, так оступишься и ногу сломаешь. Собирать укрытие требуется минимум за два часа до заката. Определить можно так: сложили горизонтально четыре пальца, вытянули руку и визуально поставили ее ребром на верхушку леса вдалеке. Если прямо над указательным пальцем солнце — самое время делать шалаш, потому что светило скроется примерно через 120 минут.
Спать просто на земле нельзя по ряду причин. Во-первых, может пойти дождь. Во-вторых, так будет холодно — застуженная спина в экстремальных условиях совсем ни к чему. В-третьих, могут напасть дикие животные. Поэтому укрытию быть. При помощи Сергея мы соорудили убежище — не зная особенностей, на это ушла бы уйма времени, но мы справились примерно за полтора часа. Осталось самое интересное — развести огонь. Вообще, в Налибокской пуще делать это нельзя. Но, во-первых, у Сергея есть официальное разрешение, а во-вторых — в экстремальных ситуациях допускается все.
Кроме тепла и защиты от животных, огонь создает психологический комфорт, а в условиях стресса важно сохранять рассудок. К тому же это хороший маркер — дым могут заметить пожарные, плюс он отпугивает мошкару и животных.
Сергей сразу предлагает читерский способ — огниво. Шваркнули (сойдет, например, лезвие ножа) по стержню — и наблюдаем эффектный сноп искр. Таким методом даже у меня, никогда не державшего огниво в руках, получилось меньше чем за минуту развести огонь, используя бересту. Эксперт советует постоянно носить с собой огниво — зажигалка может сломаться, спички — промокнуть, а с этим девайсом ничего не произойдет. Но согласитесь, вряд ли городской житель будет постоянно носить с собой огниво на случай внезапного попадания в лес.
Поэтому ищем другие способы разведения огня. Известный метод — кремень. Несколько кусочков мы подобрали прямо в лесу. Если не знать, что искать, можно спокойно пройти мимо: с непривычки все камни похожи друг на друга. Сергей вообще говорит, что ключ к выживанию в лесу — собирательство всего, что плохо лежит. К примеру, металлический конус для сбора смолы сгодится в качестве кастрюльки.
Так вот, кремень. Добыть с его помощью огонь оказалось намного сложнее, чем изначально казалось. Во-первых, камень нужно отыскать. Во-вторых, требуется сталь, причем высокоуглеродистая — такую попробуй найди в лесу. К тому же на металлических обломках не написано, сколько в них углерода. В-третьих, нужно что-то вроде кусочка материи, который начнет тлеть от искры. В-четвертых, эту искру нужно высечь, и желательно при этом не сбить все пальцы.
Кладем кусочек тряпочки размером около 2 на 2 см на кремень. Замахиваюсь стальной загогулиной (ее все-таки Сергей взял с собой), от души бью — и вижу только жалкую искорку. После 30—40 попыток становятся очевидны две вещи: ударять нужно по самому острому краю кремня; окажись я в реальных условиях выживания, меня ждала бы медленная смерть. Эксперт же за пару чирканий поджигает тряпочку. Осталось быстро положить ее в кору или рогоз (растение часто путают с камышом) и раздувать все до полноценного огня.
Наконец, проверяем самый каноничный способ — трение палочки о дощечку. Это оказалось запредельно сложно. Нужно либо соорудить что-то вроде лука при помощи палки и шнурка или прочной веревки, либо крутить палку ладонями. Постепенно деревяшка стачивается, приходится затачивать, снова тереть, потом опять точить… и так часа два. Метод, безусловно, рабочий, но он требует фантастического упорства, и использовать его можно только от полной безысходности. Проверить вариант с линзами очков не получилось: солнце некстати спряталось за облаками. Но эксперт говорит, что в ясную погоду возможно развести огонь, даже взяв обычную бутылку с водой.
Недалеко от укрытия был пруд, в котором резвились лягушки. Сергей предлагает перекусить земноводным — сперва подумалось, что это шутка, но быстро стало ясно, что специалист говорит всерьез. Отказавшись под предлогом защиты природы и желудка, решаю ограничиться добычей воды. Без жидкости все-таки прожить намного сложнее: нужно примерно полтора литра в день. Предстояло попробовать пропущенную через самодельный фильтр воду из ручья с лягушками и черт знает чем еще.
Выпить воду из ручья и выжить
Разрезаем бутылку — если стеклянная, можно обмотать ее шнурком, растереть для нагрева, а затем быстро плеснуть воды, — оставляем часть с горлышком и крышкой, затем начинаем собирать фильтр. Он состоит из трех слоев: на дно, к заранее продырявленной крышке, укладываем уголь — берется из костра. Его нужно раскрошить. Далее сыплем песок из ручья. Верхний слой — мох. Получившийся девайс, честно говоря, оптимизма совсем не внушал.
Зачерпываем мутную воду. Пока на дно другой бутылки падают капли, вспоминаю, какой медцентр ближе всего к дому. На удивление, полученная вода выглядит вполне себе прозрачной: она и близко не похожа на мутную жижу, которая была в половинке бутылки до пропуска через «фильтр».
— От запаха и бактерий такая очистка не помогает, — говорит Сергей, когда делаю глоток. Вкус поганый: застоявшаяся болотная вода с жутким запахом. Но это всяко лучше, чем пить сразу из ручья или отключиться от обезвоживания. В качестве альтернативы есть специальные таблетки с хлором: бросаешь такую в флягу с водой, ждешь полчаса, и можно пить. Попробовал и это — вода сильно отдает хлоркой, хотя к такому способу доверия больше, чем к углю с песком и мхом. Но это как с огнивом: ни один среднестатистический человек не носит с собой подобные вещи.
Можно только порадоваться, что белорусские леса не такие уж и большие: всерьез заблудиться здесь сложно. Найдя линейный ориентир — ЛЭП, дорога, река, — рано или поздно выйдете хоть к деревушке, хоть к пилораме — и уже, по сути, вы спасены. Что касается выживания в первобытных условиях, то это оказалось проблематично: развести огонь подручными средствами без подготовки практически нереально (терпение закончится раньше), пробовать воду после полевой очистки — то еще удовольствие. Разве что ориентироваться на местности получилось более-менее сносно.
Итог ожидаемый: приобщение к истокам бытия не задалось. Вернуться в мир с GPS, плитами с электроподжигом и фильтрами для воды было намного приятнее, чем съехать от этого всего подальше в лес.
nig.mirtesen.ru
Первобытные технологии — Часть 2 / 10 Видео — Исторический Петропавловск
Серия отличных роликов, которые кратко и доступно поясняют суть археологических экспериментов, реконструирующих различные первобытные технологии. Для удобства просмотра серия разбита на несколько частей по 10 видео в каждой. Под катом еще 9 серий. Описания пока что на языке оригинала, но по мере появления свободного времени они будут переводиться на русский.
Часть 1 >>Часть 3 >>
1. Primitive Technology: Bow and Arrow
(Видео на превью записи)I made this bow and arrow using only primitive tools and materials.The bow is 1.25 m (55 inches) long and shoots 60 cm (2 feet) long arrows. I don’t know the draw weight — safe to say greater than 15 kg (35 pounds) perhaps? The stave was made from a tree that was cut with a stone axe and split in half with a stone chisel. I don’t know it’s name but it’s common here and is the same wood I use for axe handles (probably Northern Olive (Chionanthus ramiflora). One half was used for the bow and was cut to a length of 1.25 m (50 inches). The limbs of the bow were carved with various stone blades so that the limbs tapered in width, and to a lesser extent depth, towards the tips. The middle of the bow was narrowed in width to form a handle about 12.5 cm (5 inches) long.
The string was made from the inner bark of a fibrous tree. It was separated into thin strips and left to dry. Then it was twisted into cordage.
Arrows were made of the same wood as the bow and were 60 cm (2 feet) long. A notch was carved into the back to accept the bow string. They were fletched with bush turkey feathers picked up from the ground (no turkeys were harmed in the making of this video). A feather was split in half and cut into 3 lengths then resin and bark fiber attached the fletching on to the arrows. The tip of the arrow was fire hardened and sharpened to a point. The fletching was trimmed using a hot coal. Each arrow took about an hour to make. A quiver was made of bark to hold the arrows. Importantly, the quiver was worn on the back in the historically accurate style of native American and African archers- not on the hip like medieval European archers (see back quiver: https://en.wikipedia.org/wiki/Quiver ).
I cleared a shooting range with a semi rotten log as a target instead of a hay bale. At 10 meters the accuracy was better than 50 % for this narrow target and the arrows stuck into the wood enough so that they were difficult to pull out. The bow was durable, shooting about 200-300 times with the string breaking only 3 times. I made a back up string and repaired them by splicing the ends back together.
In conclusion this was an easy bow to make. The short design makes it easy to find a straight piece of wood for the stave. A short string is also easy to make and short arrow shafts are easy to find. Short bows shoot fast and are easy to carry in thick forest. The dimensions of the bow were based on those given in the SAS Survival Handbook by john Lofty Wiseman. but instead of carving it from a stave from the start, I split the stave and then carved it. I think this requires less time, effort and skill. It also gives a flat bow design that’s unlikely to break. It does require wood that doesn’t twist much when split though.
2. Primitive Technology: Sling
Добавлено: 27 нояб. 2015 г.
A sling is a weapon used to fire rocks farther and harder than could be thrown by hand alone. I made this sling from bark fiber that I made into cord. The cord was then tied in such a way to produce an area in the middle with three cords. A strip of the same bark fiber was woven between these to form a pouch. A loop was tied at one end of the sling and a knot tied in the other.
To use it, the loop is slipped over the finger and the knot is held down with the thumb. A stone is placed in the pouch and the sling swung over head. At the appropriate time the sling is swung forward in a throwing action and the knot held in the hand is let go. This causes the pouch to open and the stone to fly (hopefully) towards the target.
I hadn’t used a sling for eight years but the first target I set up and filmed, a potsherd on a stick at 10 m, was hit first go! Next I set up a log at 20 m and required more practice. Targets of potsherds and tiles at 10 m were set up in a clearing. Tiles on sticks at 15 m were set up in a stretch of creek. The last shots are back in the clearing at 10 m.
Learning to use the sling is difficult and practice is necessary. When aiming line up the swinging plane of the sling with the target to determine Y-axis aspect and use release timing to determine x-axis aspect. With timing (right handed) too early and the stone will got to the right, too late and it will go left. Practice to make it go at the right time. Use larger stones as they swing slower and are easier to time. Use smooth stones so they fly straight and don’t cling to the pouch when released.
The advantage of the sling is that it’s easy to make, portable and the ammunition (stones) are every where. The disadvantages are it’s difficult to learn to use accurately, noise and movement give it away when used, it can’t penetrate a target like an arrow (unless using some kind of weighted dart) and it can’t be fired in thick forest. Interestingly, the sling has a range comparable to a bow. From my research, the record for the longest sling shot was 505 m and that of the bow just under 500 m. For some great information on slings and slinging look at: http://www.slinging.org/.
3. Primitive Technology: Baskets and stone hatchet
Добавлено: 25 дек. 2015 г.
I made 2 types of basket and a celt hatchet. The first type of basket made was a coil basket. Bunches of palm leaves where wrapped in thin strips of lawyer cane to for a coil. This was then coiled into a spiral with each coil being tied to the last to keep it in place. This was done by sewing a new section of coil to the previous one. The basket was given a flat base so it could stand up but could be made any shape.
The second basket was made of lawyer cane. It started with thick strips of cane placed on the ground crossing in the centers to form an asterix shape. Importantly another half a lawyer strip was added so that the number of spokes the basket had was odd- even numbers don’t work with this type of basket. The canes were tied together in the center with a strip of bark and a piece of cane was woven in a spiral around the spokes like a spider web. When the base was wide enough the spokes were bent up to form the vertical sides of the basket. The weaving continued up the walls to the top and the ends of the spokes folded down back into the basket.
The coil method was very time consuming (about a week on and off) and made a heavy basket but used simple materials and had few gaps in it. Long grass could be used instead of palm leaves and any type of ties could be used to bind the coils. This type of basket can look very neat if done carefully (the one I made was rough). Also I would add that circular or rectangular mats might be made using this method and these materials. This might provide thick padding against the ground for sitting and sleeping and when finished could be rolled up and stored out of the way.
The woven cane baskets were much faster to make (2 or 3 hours each including harvesting materials). They used fewer materials and were lighter too. I could have easily made them bigger but wanted them to fit through the narrow door of the tiled hut.
The baskets will be used mainly for storing charcoal inside huts out of the rain but are also useful for carrying leaf mulch for the garden. They have flat bases meaning they can stand upright and even be stacked on top of each other.
I also made a small celt hatchet for lighter work. The big celt I made is useful for chopping bigger trees but is overkill for saplings and smaller trees. The method used was basically the same for the big celt though this time I used no fire hardening. The handle came from a branch cleared from the the sweetpotato patch and had sat for a few months seasoning on the ground. It was much harder to shape than green wood but was hard enough to not need fire hardening. So far I’ve used it without the handle splitting though the basalt head chipped when trying to chop dry eucalyptus branches (an especially hard wood)- I re sharpened it and it works on other woods ok.
4. Primitive Technology: Cord drill and Pump drill
Добавлено: 22 янв. 2016 г.
I made a cord drill and then upgraded it to a pump drill. A cord drill is basically a spindle with a fly wheel attached so it looks like a spinning top. the middle of a piece of cord is then put into a notch at the top of the spindle. The ends of the cord are then wrapped around the spindle and then pulled quickly outwards causing the drill to spin. The momentum of the fly wheel causes the cord to wrap back around the spindle in the other direction. When it stops the cords are pulled outwards again and the drill spins in the other direction.
I made the first one with a stone flywheel then made fire with it in the same way I make fire with fire sticks. Then I made and fired some clay fly wheels, made another drill with one of the fly wheels and fitted a stone drill bit to the end. This one I use for drilling holes in wood.
I used the new drill to make a hole in a piece of wood. I then put the spindle of the original cord drill through the hole in the wood, tied the ends of the cord onto the piece of wood and it became a pump drill. The cords were wrapped round the spindle as normal but now a pumping action of the wooden cross bar created the same action.
This was an interesting project. For fire making I’d stick to fire sticks because the equipment is easier to make. But for people with soft hands they could use the cord drill as it won’t give them blisters. It should be added that the pump drill actually took longer than the cord drill (cord: 32 seconds, pump 1 min 30 seconds -the pump drill scene was edited down to make it watchable). The pump drill had more moving parts and was constantly having problems. As a fire making method I’d choose the cord drill over the pump drill unless all the parts were well made.
The main purpose I’d use these tool for is drilling holes rather than fire making. It was reasonably good but the stone bits I made could be improved and their attachment to the shaft also needs some thought. If the bit loosens and gets off axis slightly the whole thing wobbles.
These drills are impressive inventions and show potential for carpentry use later on.
5. Primitive Technology: Charcoal
Добавлено: 19 февр. 2016 г.
I made a batch of charcoal using the mound method then stored it in baskets for later use. Charcoal is a fuel that burns hotter than the wood it’s made from. This is because the initial energy consuming steps of combustion have taken place while making the charcoal driving off the volatile components of the wood (such as water and sap). The result is a nearly pure carbon fuel that burns hotter than wood without smoke and with less flame. Charcoal was primarily a metallurgical fuel in ancient times but was sometimes used for cooking too.
To make the charcoal the wood was broken up and stacked in to a mound with the largest pieces in the center and smaller sticks and leaves on the out side. The mound was coated in mud and a hole was left in the top while 8 smaller air holes were made around the base of the mound. A fire was kindled in the top of the mound using hot coals from the fire and the burning process began (the hot coals are being poured in the top using a small pot at 2:38).
The fire burned down the inside of the mound against the updraft. I reason that this is a better way to make charcoal as the rising flames have used up the oxygen and prevent the charcoal already made above them from burning while driving out even more volatiles .
I watched the air holes at the base of the mound and when the fire had burned right up to each opening I plugged them with mud. Once all 8 holes had be sealed the hole in the top of the mound was sealed with mud and the mound left to cool. From lighting the mound to closing up the holes the whole process took about 4 hours.
The next day when the mound was cool to the touch (this can take about 2 days sometimes) I opened the mound. The resulting charcoal was good quality. Some wood near the air entries had burned to ash though these were only small twigs and leaves. This is the reason small brush is put on the out side of the mound, to be burned preferentially to the larger wood on the inside thus protecting the large pieces of charcoal.
The charcoal that was made was hard and shiny. When broken open it had the ray structure of the wood preserved. When moving the hand through it the charcoal sounded tinny, like coral on a beach being moved by waves. These are signs of good quality. Bad charcoal is soft, breaks easily and has a muffled sound.
I intend to use the charcoal to produce hotter fires than I’m able to with wood alone. From my research, a natural draft furnace using wood (a kiln) can reach a maximum of 1400 c degrees whereas a natural draft furnace using charcoal can reach 1600 c degrees. Achieving high temperatures is necessary for changing material to obtain better technology (e.g. smelting ore into metal).
6. Primitive Technology: Woven bark fiber
Добавлено: 29 апр. 2016 г.
Woven Bark FibreI made a rough type of textile from bark fibre. This is the same tree I use for making cordage though I don’t know its name. It has been raining a lot here lately (the video also shows how well the hut stands up to rain) and this caused a large wattle tree to fall down taking a few smaller trees with it. One of the trees was the type I use for fibre. So I stripped the bark from it and divided it into thinner strips back at the hut.
I spun the fibre strips into a rough yarn using a drop spindle. The drop spindle was basically the spindle and fly wheel I used in the pump drill video I made a while ago. A small stick was tied to the top of the drop spindle to act as a hook to make sure the fibres spun. I tied bark strips to the spindle and spun the spindle so it twisted the strip. When one strip ran out a new strip was added and twisted into the thread.
I then made a loom by hammering stakes into the ground and lashing cross bars to it. Stakes were hammered into the ground to hold every first string while a moveable cross bar held every second string. When the bar was lifted a gap was formed where every second string was above every first string. Then when the bar was dropped a gap was formed where the opposite was true. So in this way the weaving thread could be drawn through over and under one way and then under over back the opposite way. The alternative was to weave by hand which would have taken longer.
Collecting, stripping and drying the fibre took a few days to do. Spinning and weaving took just over a day per 70 cm square. The result was a rough material about as stiff as a welcome mat. So at this stage I’m using them as mats. In future I will investigate finer fibres, such as those from banana stalks, as a possible material for cloth. They take more processing but produce a finer product. I may also make a permanent, portable loom that can be taken indoors when it rains.
7. Primitive Technology: Sweet potato patch
Добавлено: 20 мая 2016 г.
I built a fenced enclosure and cultivated sweet potatoes (from civilisation) and yams (from the wild) in it. I originally had a small 3X3 m garden behind the wattle and daub hut that already had some sweet potato and yam vines growing in it that were planted after the hut was built. But wallabies kept eating the leaves. So I made a wattle enclosure around it to keep them out. Wood ash was added to the soil to provide potassium and phosphorus for the growing tubers.
The previous small garden was organised in rows (not seen in this video) but this was hard to water during dry weather. So I re-organised the patch into 1 meter wide mounds with pits in the centre. Vines were planted into the mounds and water poured into the centre of each mound watered the vines. So then I had a small garden with 9 mounds contained within it. I decided to enlarge the patch to fit in more mounds so I took out 2 sides of the fence and extended them by a meter each. So the patch ended up being 4X4m and contained 16 mounds. In addition to wood ash, leaf mould was added to the mounds for fertility and to reduce loss of moisture.
The patch, being in the dark forest understory, received only about 2-3 hours of direct sunlight per day so the yield was disappointingly small. Nevertheless, the patch produced a few small sweet potatoes and a single larger yam. I also picked some green growing tips of the sweet potato vine that can also be eaten. I boiled the greens slightly in a pot with a hot stone and ate the leaves. I then roasted the sweet potatoes and yam in the coals of the fire. The sweet potatoes (purple fleshed tuber) taste sweet and starchy whereas the yam (white fleshed tuber) tastes similar to an ordinary potato. After eating, I took the wood ash from the fire and poured it back into the mounds that were harvested, replanted them and watered them. In future I’d plant the sweet potatoes in an area that receives much more sunlight in order to dramatically increase production. I’ve grown the same variety at home and it produces a much greater quantity and size of tubers in full sun. Wood ash also tends to increase tuber yield and so is a good use for waste ash.
The sweet potato is a remarkable plant. It’s a staple food of many traditional cultures. NASA has considered it a potential crop to be grown on spaceships for long term missions. In terms of energy production it’s only 3rd behind sugar cane and cassava. It produces the most food value (a combination of edible energy and nutrition) of any crop per unit space and time. A study of Fijian farms using manual labour showed that ratio of energy put into farming vs yield of energy was 1:17 for rice and 1:60 for sweet potato. It grows on marginal soil and doesn’t require much nitrogen to grow. It takes a relatively short growth period of 3-4 months to yield. All parts of the plant can be eaten including the leaves which provide additional protein and nutrients. I grow the purple variety (because it tastes better in my opinion) but all varieties are nutritious and will stave off malnutrition. A person could potentially be nearly self-sufficient from a small plot of sweet potatoes. Note that in colder climates, regular potatoes could be grown instead of sweet potatoes.
8. Primitive Technology: Grass hut
Добавлено: 3 июл. 2016 г.
I built this grass hut up on a ridge. It’s roughly parallel with the tiled hut and wattle and daub hut that are a couple of hundred meters away down in a valley. I built it on a ridge to get away from mosquitoes in wet weather. This project took 7 days to make. I looked for a spot and cleared it on the first day, built the frame on the second, and spent the next 5 collecting grass. The type of grass is Guinea grass, an introduced species here in Australia meant for live stock. This grass is difficult to collect in this dry forest and I had to climb further into the mountain to get it.
The design is a simple pointed dome that’s easy to build. The tools used were simply sharp stones and a digging stick. It’s 2.5 m wide and 2 m tall. 8 lawyer cane strips were driven into the ground to form the ribs of the structure and hoops of cane were put over this to attach the grass to. Vine was used to tie the frame together and to tie handfuls of long grass to it. When the hut was almost finished a cap was made and lifted onto the top of the dome to finish it.
This hut is easy to build and houses a large volume. The shape is wind resistant and strong for it’s materials. Gaps can be seen in the thatch but not if viewing from directly underneath meaning that it should shed rain well. A fire should be possible in the hut as long as it’s small and kept in a pit in the center.The reason the hut took so long is due to the scarcity of grass on the hill. It could be built much quicker in a field.
9. Primitive Technology: Forge Blower
Добавлено: 29 июл. 2016 г.
I invented the Bow Blower, a combination of the bow drill and forge blower to make a device that can force air into a fire while being easy to construct from commonly occurring natural materials using only primitive technology. I began by fanning a fire with a piece of bark to increase its temperature. It is this basic principle I improved on throughout the project.
Next, I made a rotary fan from two pieces of bark that slot together at right angles to each other to form a simple 4 bladed paddle wheel about 20 cm in diameter and 5 cm tall. The blades of the fan were not angled and were designed only to throw air outwards away from the axle when spun. The rotor of the fan was made by splitting a stick two ways so it formed 4 prongs. The fan was then inserted into the prongs and the end lashed to hold it in place.
Spinning the fan rotor back and forth between the palms of the hands fanned the fire. But only some of the wind generated by the fan reached the fire. The rest of it was blowing in other directions, effectively being wasted.
So I built a fan housing from unfired clay to direct the air flow into the fire. This was basically an upturned pot with a hole in the top, a spout coming out of the side. The housing was about 25 cm wide and 8 cm tall. The hole in the top and the spout were both about 6 cm in diameter so that the air coming in roughly equalled the air coming out. The base of the fan rotor sat in a wooden socket placed in the ground to make it spin easier and the top of the rotor protruded from the hole in the top of the housing.
Now when the fan spun, air entered the hole in the top of the housing and exited the spout in the side. Importantly, it doesn’t matter which way the fan spins, air always goes into the inlet and out the spout. Air is thrown out towards the walls of the housing and can only leave through the spout while the vacuum in the centre sucks new air into the housing through the inlet. A separate clay pipe called a tuyere was made to fit over the spout to direct air into the coals. This was done because the pipe that touches the fire can melt away so it’s better to make this part replaceable.
Instead of making a large wheel and belt assembly to step up the speed of rotation, I opted for a 75 cm long bow. I made a frame to hold the rotor in place consisting of two stakes hammered into the ground with a socketed cross bar lashed on to hold the top of the rotor. I made bark fibre cordage and tied the end to a stick. I then looped the cord around the rotor and held the other end in the same hand holding the stick. I then pushed and pulled the bow causing the rotor to spin rapidly, forcing air into the fire.
I made a simple mud furnace for the blower. Then I collected orange iron bacteria from the creek (iron oxide), mixed it with charcoal powder (carbon to reduce oxide to metal) and wood ash (flux to lower the melting point) and formed it into a cylindrical brick. I filled the furnace with charcoal, put the ore brick in and commenced firing. The ore brick melted and produced slag with tiny, 1mm sized specs of iron through it. My intent was not so much to make iron but to show that the furnace can reach a fairly high temperature using this blower. A taller furnace called a bloomery was generally used in ancient times to produce usable quantities of iron and consumed more charcoal, ore and labour.
This device produces a blast of air with each stroke of the bow regardless of whether it is pushed or pulled. The bow makes it possible to operate the blower without using a complicated belt and wheel assembly used in traditional forge blowers. There is a brief pause at the end of each stroke where the fan stops to rotate in the other direction, but this is effectively no different to the intermittent blast of a double acting bellows of Europe or box bellows of Asia. The materials used (wood, bark, bark fibre and clay) are readily available on most continents. No leather, valves or precisely fitted piston gaskets are required as with other types of bellows. The cords for this device wear out often so a number of back up cords should be kept handy for quick replacement. In summary, this is an easy to make device that solves the problem of supplying forced combustion air required for high temperature furnaces and forges.
10. Primitive Technology: Barrel Tiled Shed
Добавлено: 16 сент. 2016 г.
I built a tiled roof shed to provide a fire and rain proof shelter for working on projects during wet weather and for storing firewood. The shed houses the very kiln used to fire its own tiles.
I cut timber using the stone hatchet and took it to the building site. 6 Upright posts were stuck into the ground about half a meter. Mortices were cut into the horizontal beams using a stone chisel to start with, then had there mortices enlarged using hot coals and a blow pipe to burn them out more. These beams were put in place and rafters were lashed on with lawyer cane. The wood that the tiles sit on are about 50 cm apart. The finished frame was 2 x 2 m in floor plan, 2 m tall at the ridge line and 1.5 m tall at the sides. This roof angle is about 22.5 degrees, half the pitch of the huts I usually make. This took about a week but I did it about 4 months ago and left the wood at the site because I was busy on other videosNext I made a kiln. I made a basket to make it easier to carry clay from the creek. I dug a trench for the firebox of the kiln and made a clay vault over it using stick arches to support it. Holes were put into the vault to let flames through. The kiln shape was a cube with a domed roof. It was made of mud on site (clay from the creek is too good to build a kiln with and is best used for pottery). Grate bars were put into the firebox to increase wood burning efficiency by letting air come up through the wood rather than over it. This only took about 3 days to build letting it dry slowly.
To make the tiles, clay was collected and had the sticks and stones taken out of it. Then I crushed up old broken pottery and tiles I made before which I mixed with the clays as grog (stops clay from cracking). A tile frame was made from a split piece of lawyer cane bent into a trapezoidal shape about 50 cm long, 20 cm at the wide end and 16 cm at the narrow end. This was put on a flat stone. Wood ash was put down to stop the clay sticking to the rock. The clay was pressed into the fame and the wet tile was slid onto a curved piece of wood to form the curved shape of the barrel tile. The tile was then moved immediately to a flat area and the piece of wood was slid out so the tile sat on the ground to dry. Being curved, air could get under the tile to help dry it out.
I could make 30 tiles easily in a day and only had 150 to make. But it kept raining and destroying the tiles before they dried. So I had to make 30 tiles, let them dry enough to be moved, then take them to the tiled hut where they were force dried on the ondol (fire heated bed). The majority of the time spent on this project was re-making broken tiles due to unseasonal rain (I don’t think we have a proper dry season here anymore, this is what held up my other tiled hut too). So this whole part probably took 4 weeks.
Firing the tiles was easy compared to the other tiled hut I built. I could fit 30 tiles in the kiln at once and had 150 tiles to fire. The 5 firings took 5, 4.5, 3.5, 4.5 and 3.5 hours. The first one probably took longer due to the kiln not being dry yet and the 4th firing took a while due to wet firewood. Tiling the roof was also easy. Starting at one end, tiles were laid so that the concavity faced up and the narrow end pointed into the next tile below acting like a shoot for water to run down. The gaps between these tiles was covered using a tile with the concavity facing down and the narrow end pointing up under the next tile above. The ridge of the hut was covered with the same tiles interlocking to keep rain out. The low roof pitch, the weight and friction of the tiles, the fact that they interlock all help to keep the tiles in place meaning they don’t need tabs or pegs to hold them in place.
The roof sheds rain and is fireproof. This will provide a workplace for fire related projects in all weather. Walls were not built as this is a place for working and storing firewood, not sleeping and staying warm. Also, light can come in so it’s easy to see during work. The kiln worked ok and was able to handle a larger volume of tiles than the previous kiln I built (having over 4 times the volume) though I might investigate better kiln designs in future to attain higher temperatures and use less firewood. The roof of this shed has a lower angle to my other huts meaning it has more headroom. Ideally barrel tiles should be used at about 30 degrees as opposed to the 22.5 I used but being a small shelter I don’t think the water will build up and seep through. A large house would use a slightly steeper angle.
Оцените материал:
history1752.su
Первобытные люди знали "передовые" технологии еще 71 тысячу лет назад
Культура
Ученые обнаружили свидетельства передовых технологий Каменного века, которым 71 тысяча лет, недалеко от городка Моссел Бей, на южном побережье Южной Африки. Эта технология, позволяющая кидать снаряд на большое расстояние, обладала убойной силой и была замечена ранее у жителей Африки и Евразии, живших 20 тысяч лет назад.
Сравнив эту технологию с передовыми технологиями и свидетельствами раннего символического поведения в этом районе, ученые смогли подтвердить, насколько сложным было поведение людей Каменного века и что это поведение могло служить сигналом к развитию современного человека в этом прибрежном регионе.
"Каждый раз, когда мы раскапываем новый участок на побережье Южной Африки с передовыми техниками, мы находим новые неожиданные вещи, которые все больше доказывают, что поведение человека может быть уникальным", – сказал один из авторов исследований Куртис Марин (Curtis Marean), профессор из Университета Аризоны.
Новая технология основана на аккуратном производстве длинных тонких каменных лопастей, которые притупляются с одного края и могут помещаться в щели в дереве или камне. Эти приспособления можно использовать в качестве снарядов для лука, но, вероятнее всего, их использовали для метания копья (атлатль).
Передовые технологии Каменного века
Это устройство давало большие преимущества по сравнению с метанием копий голыми руками. Например, при встрече с разъяренным буйволом (или врагом-человеком) оружие такого типа значительно повышало шансы умертвить неприятеля, существенно снижая риск получения травмы для охотника/воина. Камень, который использовался для производства этих особых лопастей, осторожно обрабатывался с помощью сложного процесса под названием "термообработка", технологии, которая появилась чуть ранее на побережье Южной Африки.
Участок, где была открыта эта технология, называется Пеннакл-Поинт. Тут сохранилось около 14 метров археологических отложений, возраст которых от 90 до 50 тысяч лет. Определение возраста и периода использования технологии стало возможным благодаря беспрецедентной работе исследователей в течение 9 лет. Каждый новый артефакт, обнаруженный в ходе раскопок, который относится к деятельности человека, тут же схематично изображался с помощью компьютера и тахеометра.
Тахеометр – прибор для исследований, который фиксирует в цифровом виде точки, где был обнаружен артефакт, для создания 3D модели раскопок. На сегодняшний день в компьютер было внесено местоположение почти 200 тысяч находок, раскопки продолжаются.

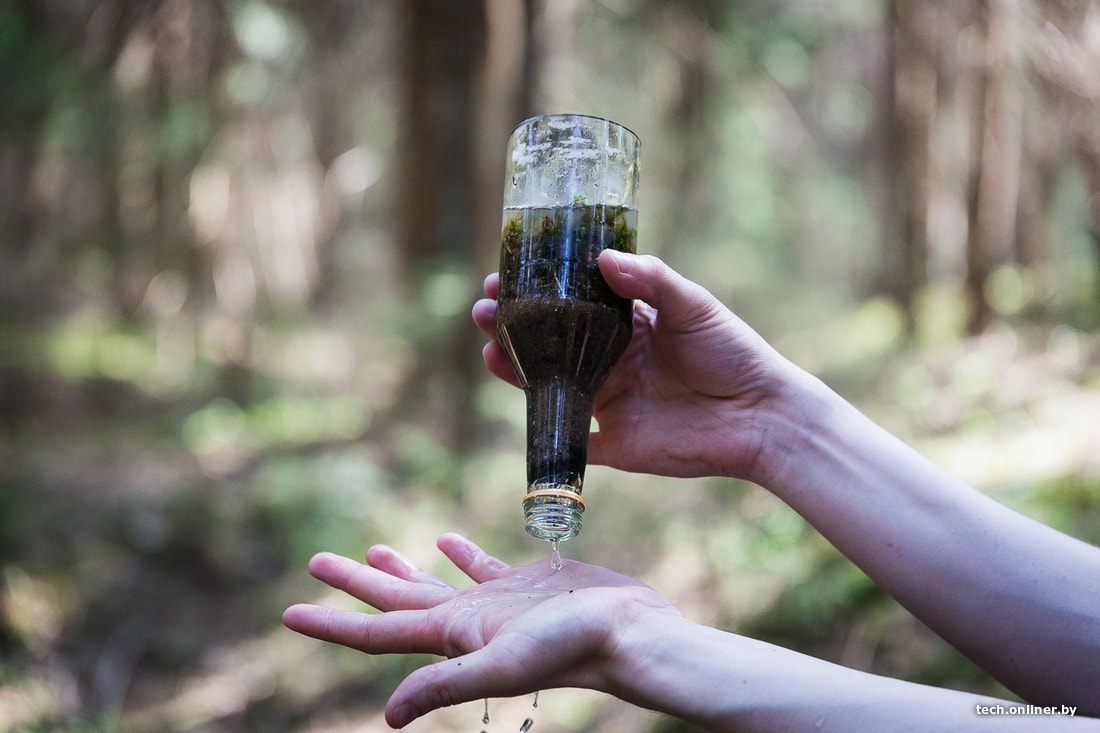


 Культура


